A shopper lands on your product page, reads the description, swipes through the gallery, scrolls past the specifications, checks a few reviews — and by the time they’ve decided to buy, the Add to Cart button is a full screen or two above them. On a phone, that’s a lot of thumb-scrolling back up. Every one of those scrolls is a moment where a ready buyer can get distracted and leave.
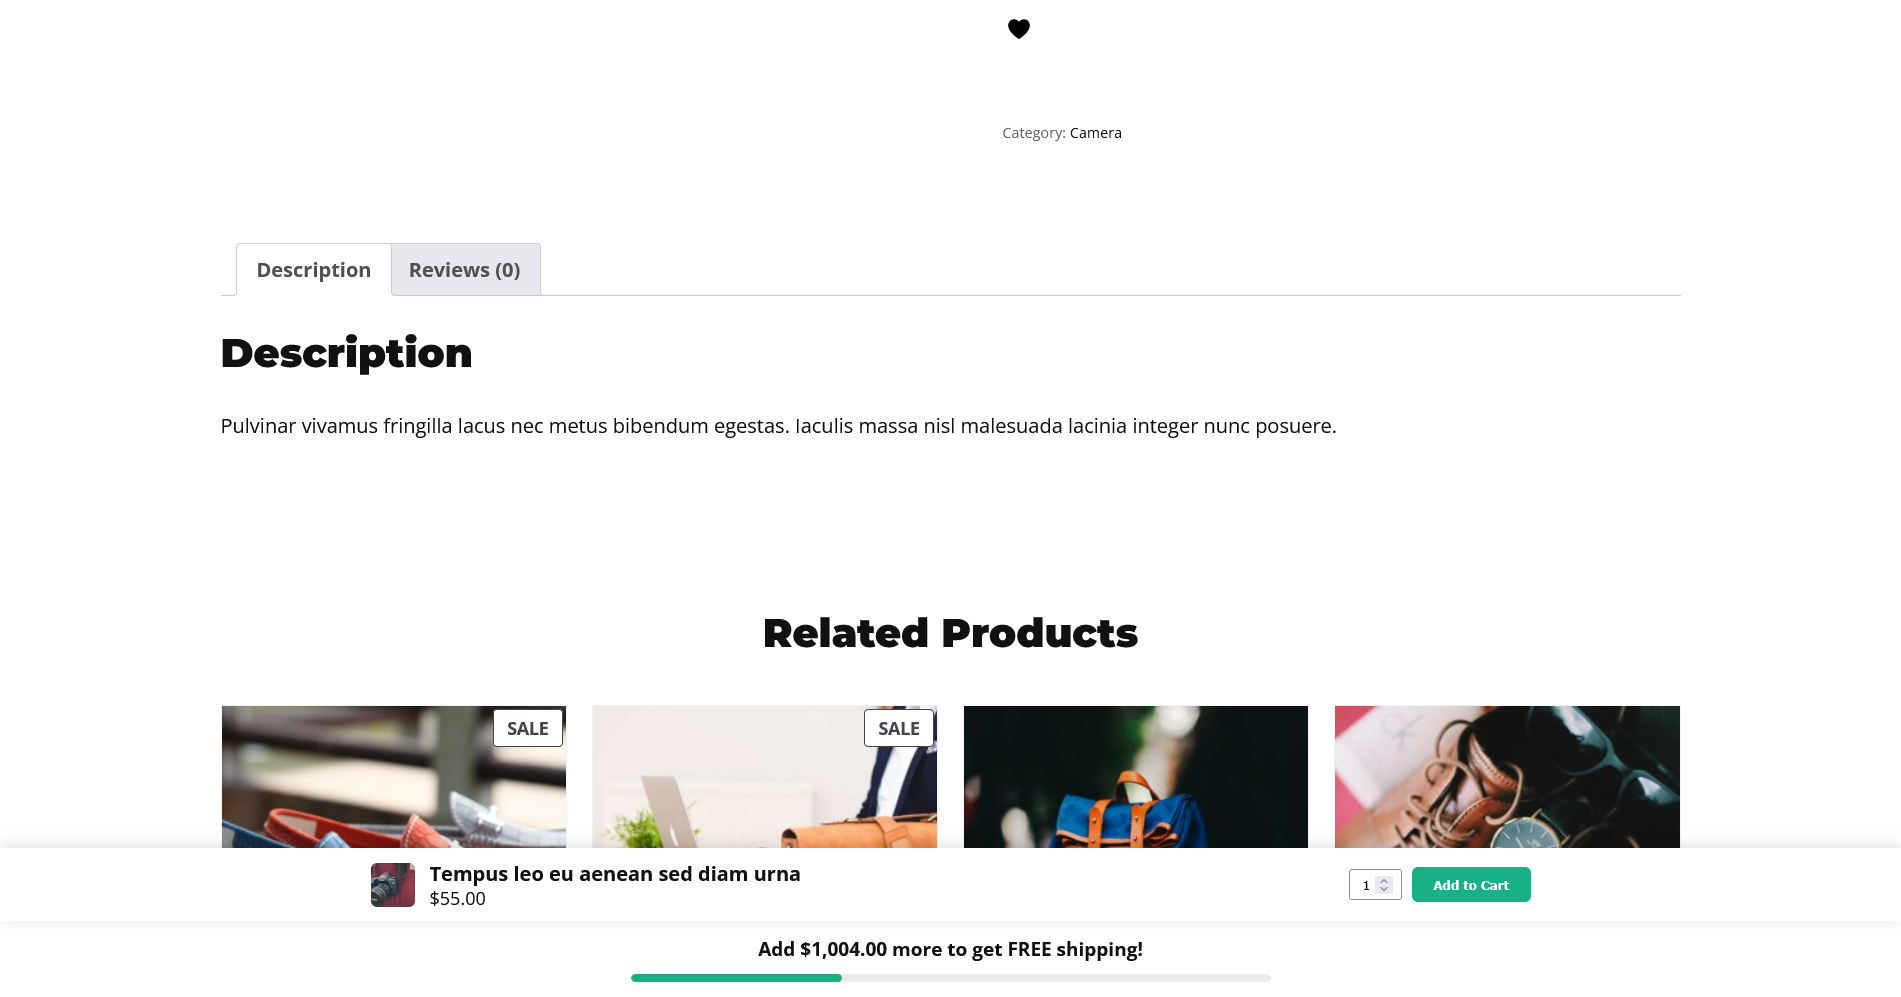
A sticky Add to Cart button solves this by keeping a compact “buy” bar visible as the shopper scrolls, so the purchase is always one tap away. In this guide we’ll cover three ways to add one to WooCommerce — a CSS-only attempt, a custom-JavaScript approach, and a purpose-built plugin — and be honest about the trade-offs of each.
Why a sticky Add to Cart button lifts conversions
Two realities of modern eCommerce make this feature punch above its weight:
- Most WooCommerce traffic is mobile. On a small screen the Add to Cart button leaves the viewport after the very first scroll, and the taller your product content, the longer it stays gone.
- The decision happens after the scroll, not before it. People read, compare, and reassure themselves before buying. The instant they decide is usually deep in the page — precisely when the button is nowhere to be seen.
Keeping the button in reach removes friction at the exact moment of intent. It doesn’t try to convince anyone — it just makes sure that when they’re ready, acting on it takes one tap instead of a hunt.
What a good sticky bar needs to do
Before we look at methods, here’s the bar you’re actually trying to build. A solid sticky Add to Cart bar should:
- Appear only when the real Add to Cart button scrolls out of view, and get out of the way when it’s back.
- Stay compact — a thumbnail, the price, an optional quantity field, and the button — not a full copy of the product form.
- Actually add the product to the cart using WooCommerce’s real logic, so stock checks and AJAX behaviour keep working.
- Handle variable products: reflect the selected variation’s price and image, and not add to cart until a required option is chosen.
- Feel native on mobile, where it matters most.
Keep that checklist in mind — it’s what separates a bar that converts from one that annoys.
Method 1: CSS only (quick, but limited)
The simplest idea is to pin the existing product form with CSS. Add something like this to your child theme or Customizer:
@media (max-width: 782px) {
    .single-product form.cart {
        position: sticky;
        bottom: 0;
        z-index: 50;
        background: #fff;
        padding: 12px;
        box-shadow: 0 -2px 10px rgba(0,0,0,.1);
    }
}
On a simple product with a short form this can look acceptable. But it breaks down quickly:
- Variable products render the variation dropdowns inside
form.cart, so you’d pin the whole selector to the bottom of the screen — not a tidy bar. - No compact summary. CSS can’t build a thumbnail-plus-price bar out of the form; it can only reposition what’s already there.
- Theme conflicts. Sticky headers, mobile nav bars, and cookie notices all fight for the same fixed edges and z-index.
- It’s always on. There’s no easy way to only show it once the original button has scrolled away.
Use this only for a very simple catalogue where you just need something and can live with the rough edges.
Method 2: Custom JavaScript (full control, real work)
To build a proper compact bar you need a little JavaScript: watch the real button, reveal a custom bar when it leaves the screen, and have your bar’s button trigger the real one. The core is short:
document.addEventListener('DOMContentLoaded', function () {
    var realBtn = document.querySelector('form.cart .single_add_to_cart_button');
    var bar     = document.querySelector('#my-sticky-bar');
    if (!realBtn || !bar) return;

    // Reveal the bar when the real button is off-screen.
    new IntersectionObserver(function (entries) {
        bar.classList.toggle('is-visible', !entries[0].isIntersecting);
    }).observe(realBtn);

    // The bar's button drives WooCommerce's real button.
    bar.querySelector('.add').addEventListener('click', function () {
        realBtn.click();
    });
});
That skeleton works, but a production-ready version has to handle everything the checklist above demands, which is where the effort adds up:
- Building and styling the compact bar markup (image, price, quantity, button) for every product.
- Syncing the bar’s quantity field with the real quantity input in both directions.
- Listening to WooCommerce’s
found_variationevent to update the price and image when a variation is selected, and disabling the button until one is. - Hiding the bar for out-of-stock or non-purchasable products.
- Positioning around your theme’s other fixed elements, and testing across templates and devices.
None of it is exotic, but it’s a real mini-project to build, style, and maintain as WooCommerce and your theme evolve. If you’re comfortable in JavaScript and only have one store, it’s a valid path.
Method 3: A plugin (the practical route)
For most stores, a purpose-built plugin gives you everything on the checklist without the maintenance. Sticky Add to Cart Bar for WooCommerce shows a slim bar the moment the real button scrolls away, drives WooCommerce’s own Add to Cart button (so variations, validation, and AJAX all keep working), and mirrors the selected variation’s price and image. Setup is quick:
- Install and activate the plugin alongside WooCommerce.
- Open Sproutient → Settings and choose the bar’s position — bottom (best on mobile) or top.
- Toggle the product image, price, and quantity selector, then save.
The bar then appears on your product pages automatically and inherits your theme’s styling, so it looks like a native part of your store.
Best practices once it’s live
- Prefer the bottom position on mobile. It sits under the thumb and matches what shoppers expect from apps.
- Keep it lean. Price and button are essential; hide the quantity selector if your products are typically bought one at a time.
- Watch for collisions. If you already run a sticky header or a cookie bar, switch the position so they don’t stack.
- Test on a real phone. Emulators miss touch targets and safe-area spacing on notched devices.
Frequently asked questions
Does a sticky Add to Cart button work with variable products?
It should — but only if it uses WooCommerce’s real Add to Cart button. A well-built bar reflects the selected variation’s price and image and won’t add to cart until a required option is chosen. CSS-only approaches generally can’t do this.
Will it slow my product pages down?
A good implementation loads only on product pages, ships minimal CSS/JS, and reveals the bar with the browser’s efficient IntersectionObserver rather than heavy scroll listeners. The impact should be negligible.
Can I show it only on mobile?
The scroll-away problem is worst on mobile, so that’s where it matters most — but a bottom bar works well on desktop too for long pages. Test both and decide based on your traffic.
The bottom line
CSS gets you a crude fixed form; custom JavaScript gets you a real bar if you’re willing to build and maintain it; a plugin gets you the whole checklist — variation-aware, mobile-first, native-looking — in a few minutes. Pick the one that fits how much you want to build versus install.